 In the past few years, there has been a spike in new data recovery labs opening up across the USA and other countries. When researching topics on data recovery forums, it looks like a number of computer repair shop owners are looking for a new business, and data recovery is enticing.
Let’s be clear: PC repair and professional data recovery service are not similar in any way, and I’m not just referring to the tools and training. Incompetence in computer sales and service can be an inconvenience or result in lost time and extra costs for the customer, but incompetence in data recovery services can be devastating. In my opinion, the most important part of running a data recovery business is to acknowledge that you, your technicians, and your engineers might not know everything. Figure out what you are exceptional at and where you lack the tools, training, and knowledge for specific cases. You should work to fill those gaps, but if necessary, be willing to admit that a particular case may be beyond your ability.
Of course it’s the data owner’s responsibility to keep more than one copy of their family photos and videos, tax records, corporate documents, medical records, accounting databases, client records, and so on, but unfortunately, backups are too often just not maintained or monitored, and individuals and small business owners often find themselves counting on a data recovery professional as the last resort. With that responsibility in our hands, all data recovery professionals need to understand that the most important thing is to give the recovery every chance of success. While some cases are DOA and just not recoverable by anyone, the majority of data recovery cases are recoverable, at least partially, and special effort needs to be taken to ensure the data recovery professional isn’t the one jeopardizing recoverable data.
With that in mind, one of the most important guidelines I can give (especially to newcomers to the data recovery field, but even some established professionals can use the reminder) is this: Don’t experiment on your patient.
What you don’t know might hurt the customer. There is no excuse for experimenting on a customer’s media. Even if they understand completely that letting you proceed may destroy all possibilities of a successful recovery and that there might be someone else who can recover the data, you should just avoid experiments with customer-owned devices even if they approve it. Once the device is destroyed from a failed experiment, there is a very good chance the customer will regret that they didn’t get a second opinion. In that case, they will not care that you tried to warn them, they will only remember that you destroyed their only chance at recovery. So that’s my first tip for new data recovery professionals: don’t offer and do not let a customer convince you to experiment on their device. Return the device to them just in case they decide to get a second opinion. If they don’t have the money right now, you should encourage them to safely store the device because one day they might change their mind about how much it’s worth.
So how do you know when you are experimenting? For starters, you can consider these actions as experimental:
- Performing a specific task you have never successfully completed.
- Performing a task without the proper tools.
- Using a vendor specific command without understanding what it actually does.
- Not performing a proper inspection in the clean room just to save time or money.
Experimentation, testing, and practice should be done with new and/or used storage devices that you purchase specifically for experiments and training until you have confidence in what you are doing. There is no set length of time for this; you have to train until you have a high rate of success and you gain confidence. If you don’t have the time, patience, or aptitude, then accept that you are just the business owner and you need to employ or partner with a qualified data recovery engineer or technician.
Handling each data recovery case
Where do we go from here? Let me list some things we consider at Blizzard Data Recovery to be standard operating procedure. Some of these procedures could be the difference in a successful recovery and catastrophic failure.
The first step is to start a case for each newly received device. Sure, this may sound obvious, but why is this such an important step for a successful recovery? Because keeping good documentation and labeling from the start of each case prevents mistakes and mixups, misplaced parts or entire drives, or even returning the device or data to the wrong customer. You will need a case number that you can use to link to the customer’s contact information and to track the device throughout the recovery process. At Blizzard, upon receipt of the device, we assign a unique case number and affix a printed label with the case number to the hard drive cover and PCB. If the frame doesn’t have a serial number, we apply a label to the frame too. If the disk drive appears to have been previously opened, poorly packaged, or the client indicated it was dropped then we flag the device with a special sticker. In our case files, we enter the case number, drive serial number, model number, and client contact information. We also record a number of other details that can help with statistics but are not essential to the case. Once the case has been started and the device is marked for identification, it is located in a storage area for new cases that are waiting for diagnostics.
Now we move to the diagnostic stage where we determine if the drive needs to go straight to the cleanroom or if it can be connected to one of our PC-3000 ports for initial testing. Our standard procedure for any drive that was previously opened is to take it to the clean room for inspection. Even a drive that was previously opened by a reputable lab needs to be inspected internally. Powering up a hard drive that was previously opened by anyone for any reason without a complete internal inspection is irresponsible. You’re rolling the dice on a potential disaster.
Standard procedure for inspecting a hard drive should start with cleaning the outside of the drive before opening it. This helps keep dirt out of the drive as well as your cleanroom or cleanbench workstation. Now put on your gloves! I can’t tell you how many hard drives we have received from other labs that have fingerprints inside. Don’t be that person. And do not open hard drives if you do not have a properly filtered work environment for that specific purpose.
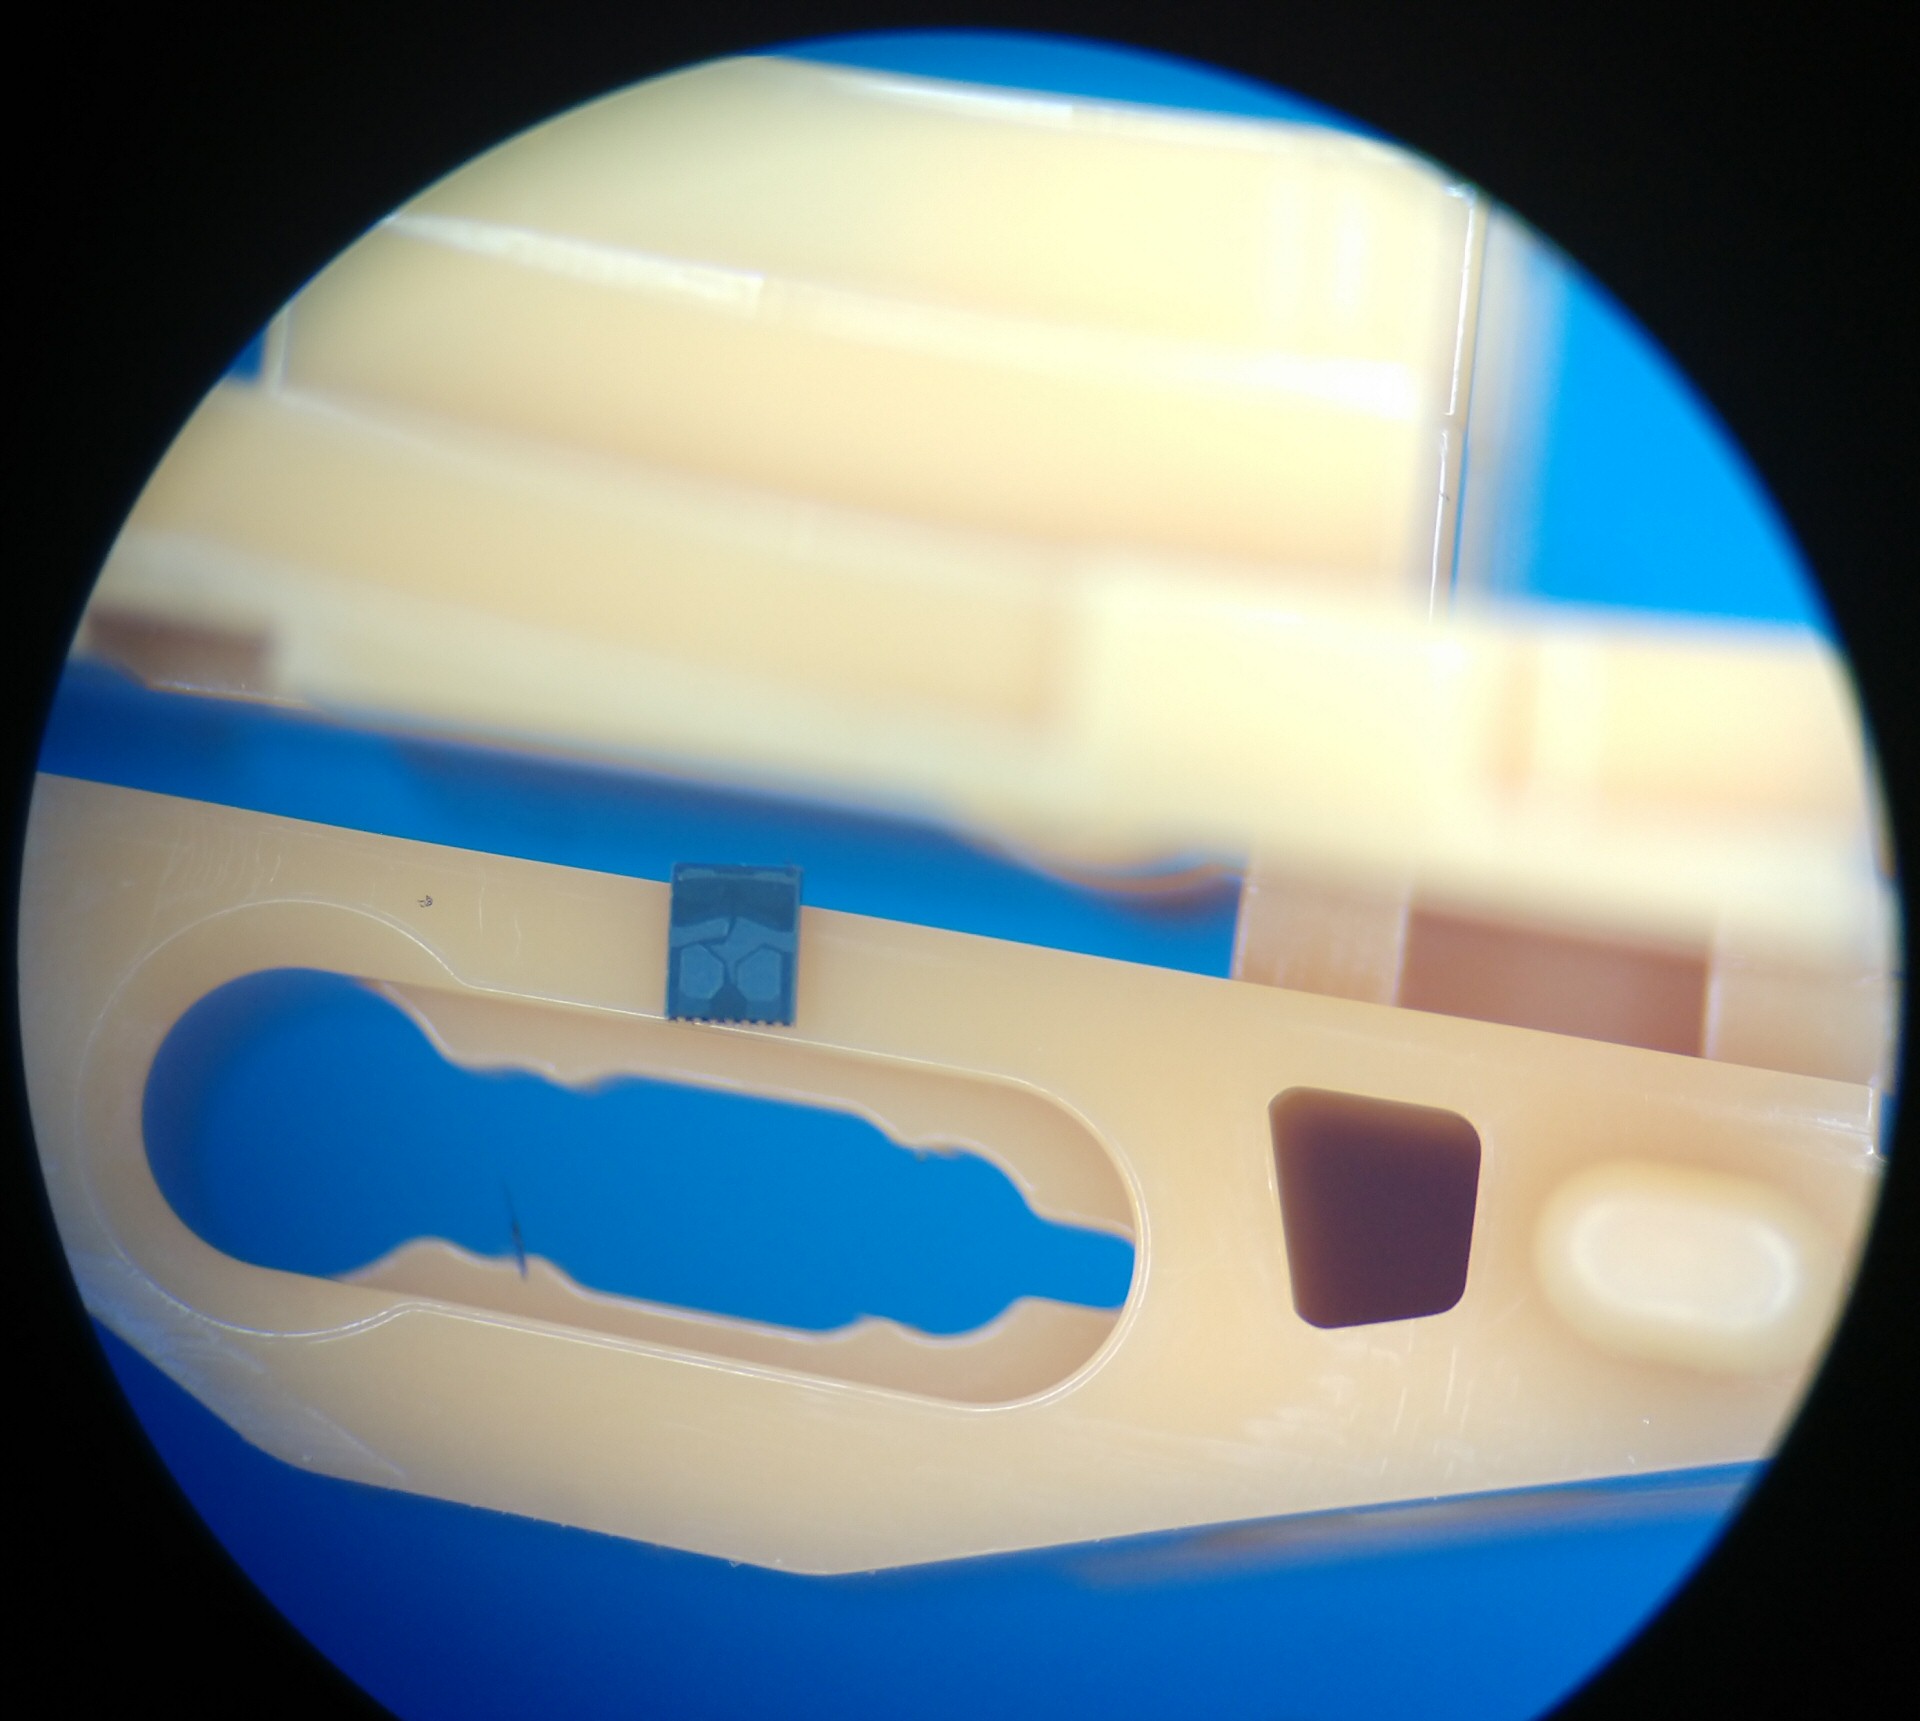
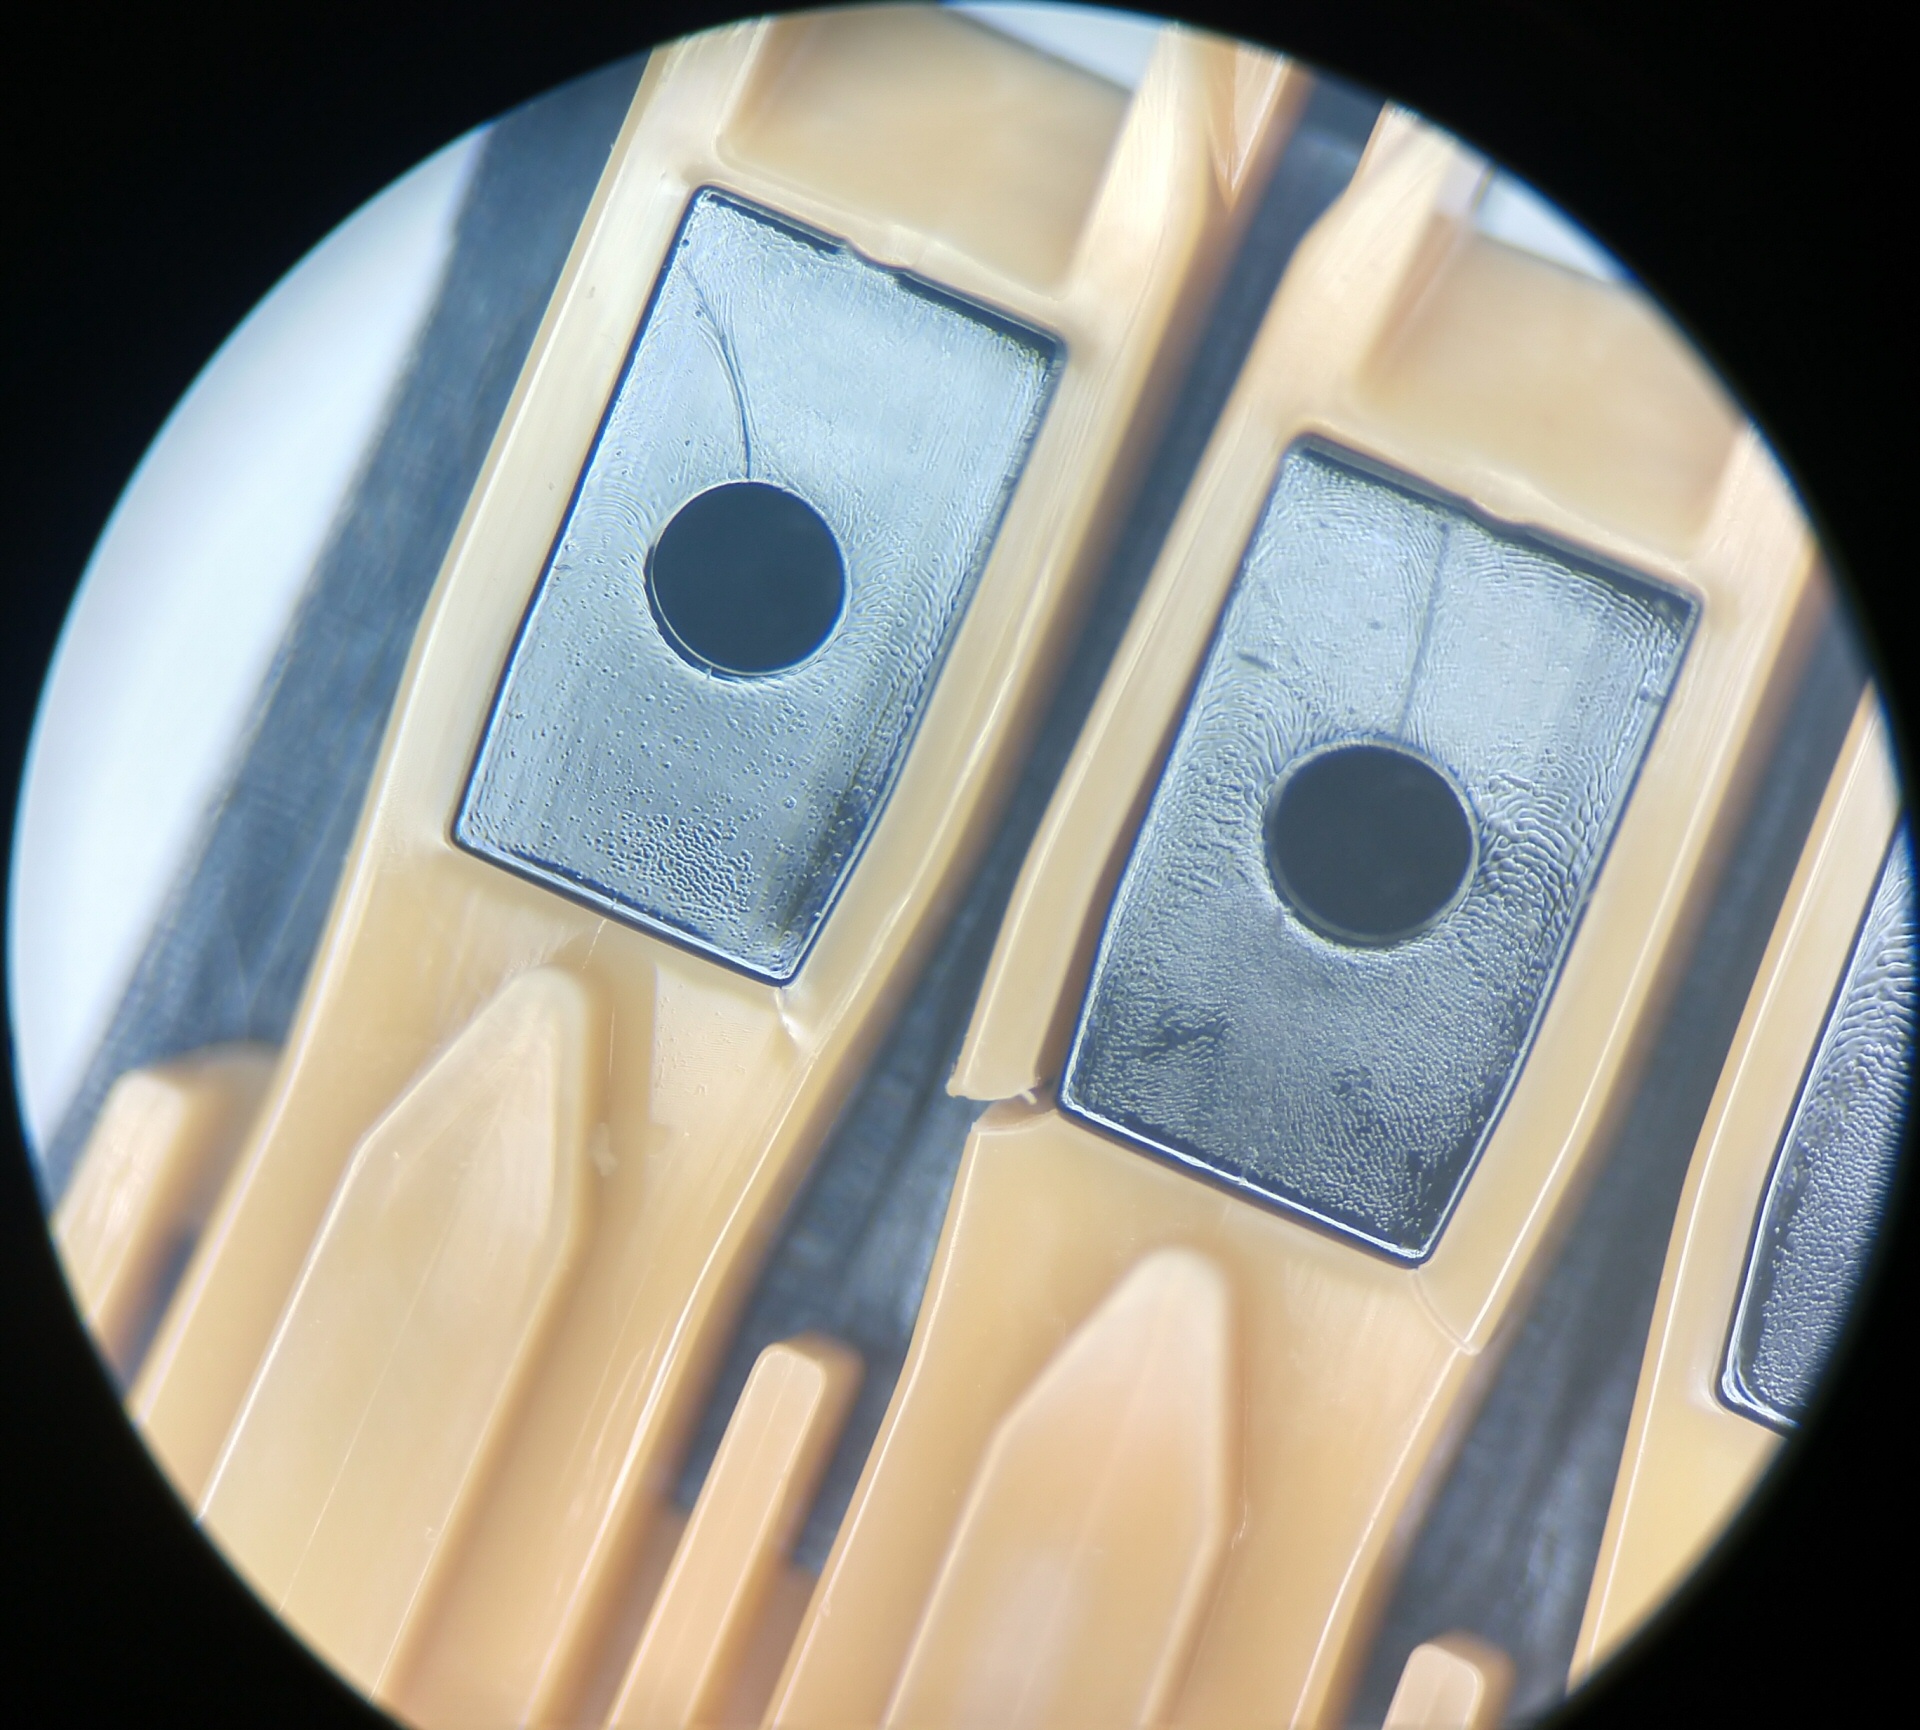
Once the drive has been opened, you can look for broken parts, stuck heads, contamination on the platter surface, in the filter, or on the inside cover. If the drive was previously opened then check for dust, hair, and fingerprints and clean as needed. If you have a stiction case where the heads are stuck on the platter(s), you need to remove the head rack assembly and inspect them under a microscope for contamination or damage. If you don’t have experience unsticking heads then you are experimenting. Pulling the heads back to the ramp and powering on the drive to see if they still work is not acceptable and, again, is rolling the dice on disaster.
For stiction cases and dropped hard drives, you should remove the head stack and inspect it under a microscope. This means you need to have experience and a good understanding of how the head assembly is manufactured and what it should look like under a microscope. Otherwise, you may not know when the suspension or sliders are bent, damaged, or missing. Reinstalling bent or broken heads can be catastrophic. If a slider is missing, you have to account for every slider before you install a new head assembly. Powering on a drive when a slider is hiding inside is most likely going to result in a catastrophic failure. If it doesn’t, it was probably your day to win the lottery. Hopefully you bought a ticket. 🙂
 Something you might overlook when inspecting a dropped hard drive is a damaged or broken ramp. It’s not uncommon for the parking ramp to suffer some scrapes and cuts. The shavings from the damaged ramp could easily result in a catastrophic failure. It’s best to use your donor ramp if you have damaged heads, but be sure to inspect the patient ramp so you can become familiar with the different types of damage that can occur. If the ramp is cracked, you will most likely damage a perfectly good set of donor heads. This is something you rarely hear talked about on forums, but labs like ours that have handled thousands of cases are very familiar with cracked ramps. It’s not uncommon. If you install a set of donor heads and they appear to twist or bind when moving them to the ramp, it might be cracked.
If upon inspection the heads are stuck at the outer edge of the platter right next to the ramp, they are most likely bent and could not get back in the ramp. It’s possible the metal parts of the head assembly have scraped the edge of the platter and you might see some metal filings in the ramp (use a microscope). In this case you should replace the ramp and remove the metal filings to prevent a catastrophic failure.
Don’t take your basic tools for granted. Clean your tools! The drivers (Torx, Pentalobe, Phillips) you use every day will build up metal shavings and particles from use, and if you don’t clean your tools regularly, those particles can end up inside a hard drive. Think about it: it’s metal on metal every day, over and over. Also consider the type of pliers used to remove the hard drive’s top magnet. Pliers with coarse jaws are going to scrape metal from the top magnet assembly. Make sure your tools are right for the job. I have seen plenty of magnets that were handled in another data recovery lab that look like they were chewed up by a beaver.
That’s it, my introduction to hard drive data recovery practices for those considering the business and those that are just starting out. The physical or mechanical aspect of hard disk recovery is considered by some to be the “easy” part, but in my opinion it’s the part that beginners are the most likely to take for granted and can lead to the worst type of failure. We even see it with do-it-yourself cases where the device owner thinks it can’t be much different than installing a dishwasher or tuning up their car. The problem is what you don’t know or understand is hidden at a microscopic level, and ignoring that typically results in lost data — for good.