Can a USB flash drive be repaired or recovered? In most cases, YES! How do we repair a broken USB thumb drive? Take note, the data recovery method can be quite different if the flash media has just stopped working. In some cases, the metal USB connector might come loose or break off. Assuming no pads are torn, this could be an easy case for a do-it-yourself project, but many times this just isn’t the case. There is also the chance that someone with the wrong tools or experience can make the job more difficult or even unrecoverable. If your data is important, you should seek a professional data recovery company. If you can’t find a reliable recovery lab near you then send it to us, we are always ready to provide fast and friendly service.
Here is the procedure we use at Blizzard Data Recovery.
 Broken USB Connector: First, the thumb drive is inspected under a microscope. If the connector is in one piece, it is tested for continuity. If the pins are broken or it fails the continuity check, the connector is removed. This test is important because it’s not uncommon for the pins to break inside the connector. The next step is to inspect the pen drive’s connector pads on the PCB. If the connector was loose or broken, the pads can be torn or lifted. Under a microscope, we can determine if the pads are still in good shape. If they are, we can reconnect the original working USB connector or remove the old connector and install a brand new one. But don’t be surprised if there is more to it than just a broken USB repair.
Lifted or Torn Pads: If the pads are torn or lifted on the PCB then we have to replace them. Note the path/trace in case the new connector is going to cover or hide the path from view. At our recovery lab, we typically replace missing pads with a micro-thin copper tape that we cut to the correct width under a microscope. We can also use small magnet wire (or similar) to remake the connection path. Sometimes we see failed do-it-yourself cases where the pads are lifted with the connector and the traces have been torn from the PCB. In these cases we have to determine if it’s more practical to use wire or copper tape to restore the connection(s).
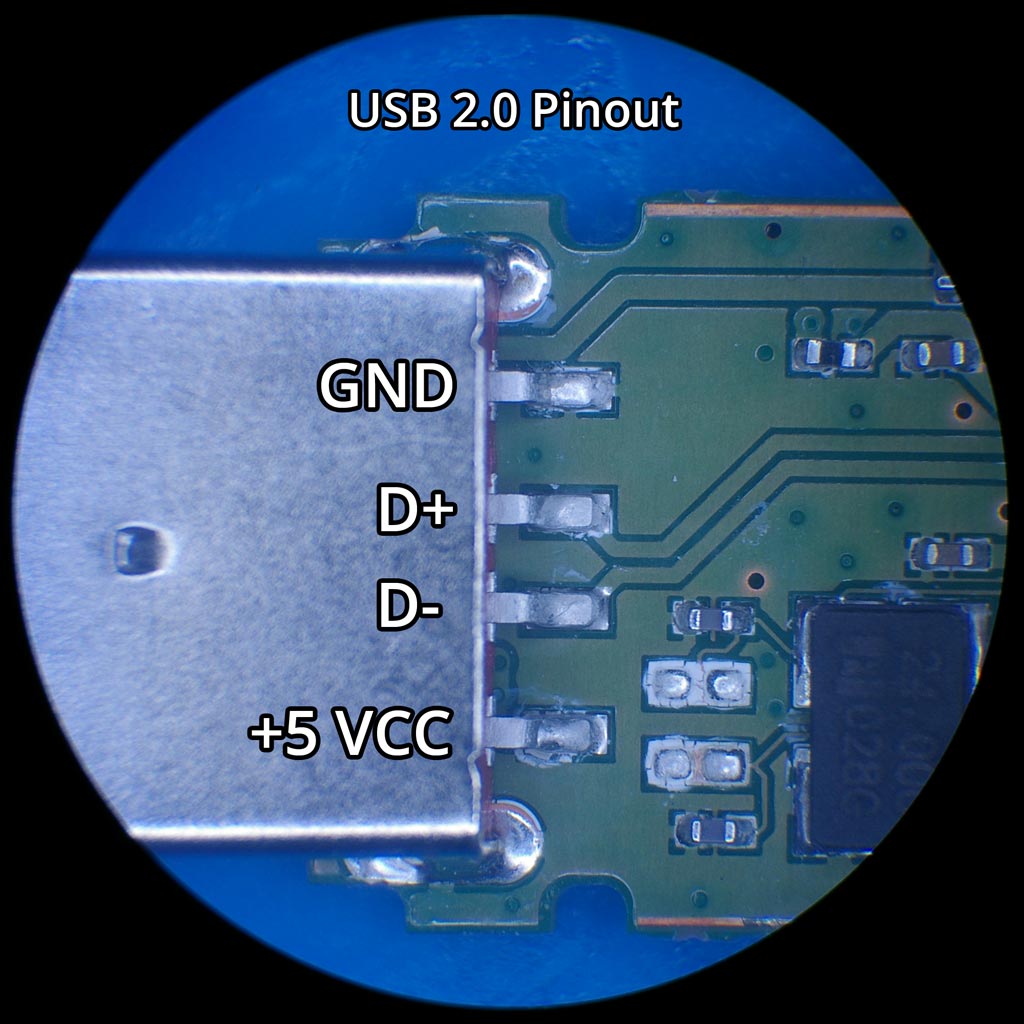
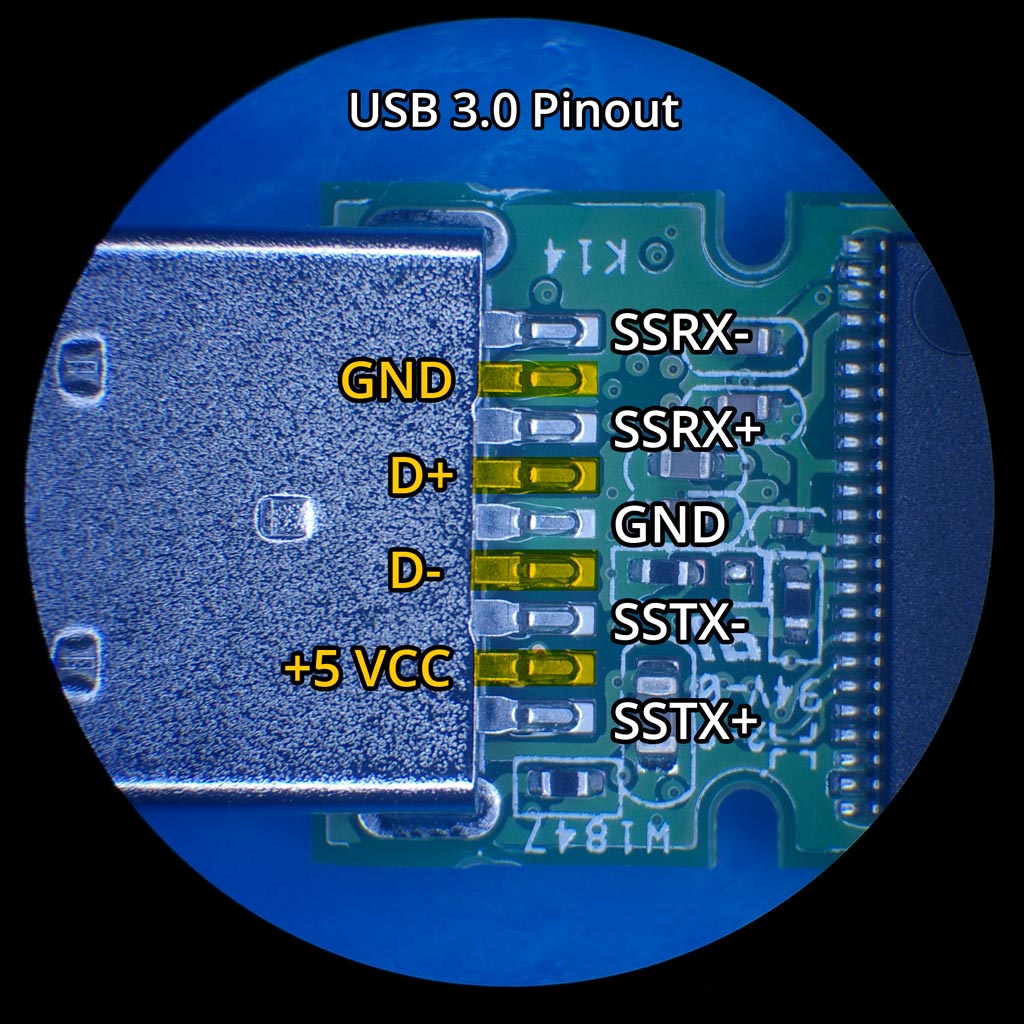 Checking The USB Connection: Now that we have our pen drive connector and contacts repaired, we need to perform some tests with a multimeter. Using diode mode, we can check for shorts to ground and continuity on the power circuit. It helps to know the pinout for USB connectors before performing any tests. Refer to our diagrams for standard USB 2.0 and USB 3.0 pinouts. For USB 2.0, you want to test for shorts to ground on VCC, D-, and D+. If you are working with a USB 3.0 connection, you need to test VCC and all differential pairs. If you have a short to ground, you can start by testing for a failed capacitor, assuming you have not created the short when you soldered the connector. 🙂
 Checking VCC: In many cases, a USB stick will have some type of simple protection circuit (SMD component). It could be a zero ohm jumper, a resistor, a littelfuse, etc. You need to check to ensure this type of protection device is not creating an open circuit.
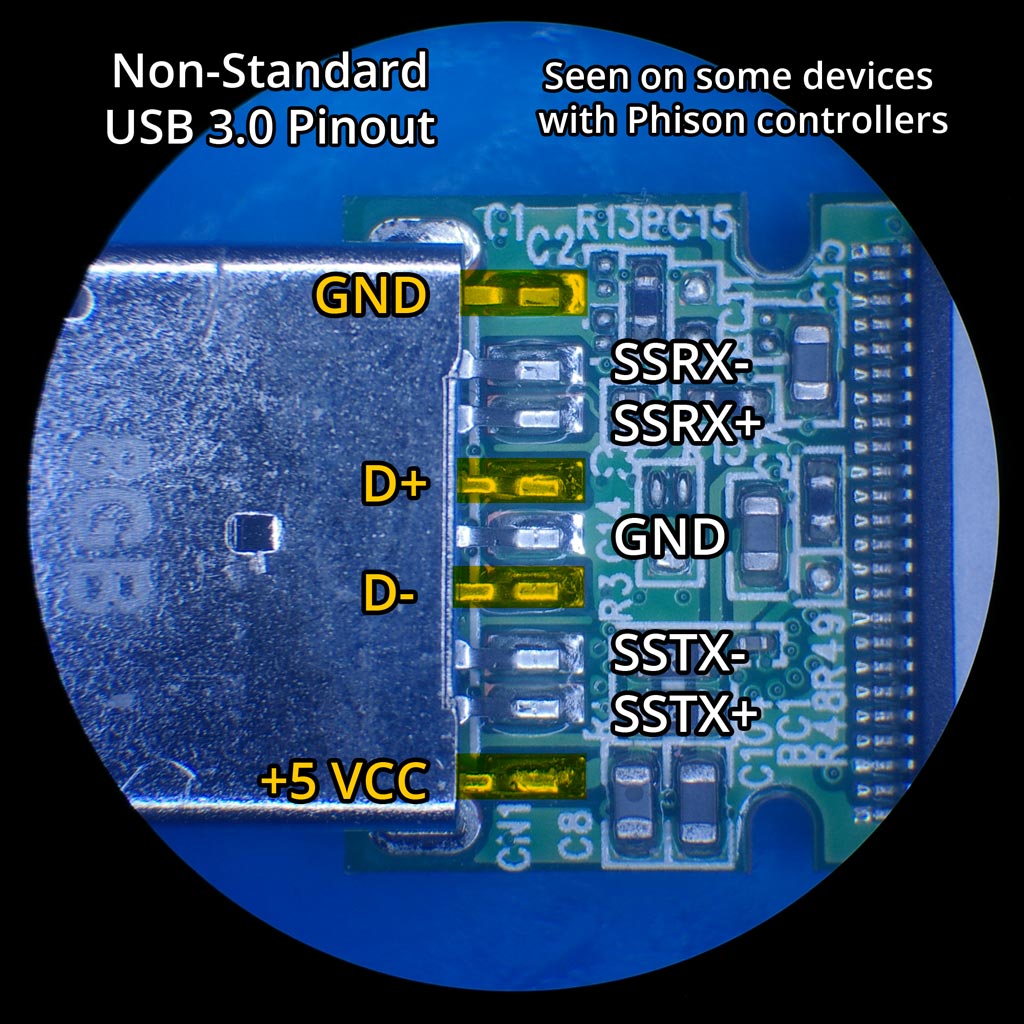
Note: There are some less common 3.0 flash devices that use a non-standard pinout, so beware. We have seen this on some PNY flash drives with Phison controllers.
If everything checks out, then you can plug in the flash drive and recover the data. Or can you?
Case Study: Lexar 128GB with Cracked PCB (SM3267L-AB)